Saturday, 12 March 2011

Newbury Production Week

For the last two weeks I have been travelling down to Newbury to help with the get in for the show at the corn exchange. During this time I finally saw the set I had been helping to build, in the warehouse in Lewes, finally start to come together. As well as assisting in the assembly of the set on stage I also helped make a number of props that were used to dress the set and add to the style and setting of the play.


One of my first jobs was very simple, painting matchboxes so they looked more aged and in keeping with the time frame of the play.

As well as this I was sent out to buy a number of things that were needed for the set, such as a bottle of red wine with a cork not screw top and something the actors could put their cigarettes out in on stage without their being any chance of the stubs remaining lit. I was recommended to get some sort of cream from boots or a supermarket, etc to be put in the bottom of an ash tray, but as anything I found was either quite expensive or not flame resistant I suggested just using tooth paste as its much cheaper and would do the job just as well. Which we did.

As some of the set was still under construction I helped finish off cutting out the plywood shelves for one of the three book cases. As we were running out of time it was crucial I worked quickly and accurately so we could complete the set for the following days run. As well as cutting out the shelves for the book case I also had to secure them in place on the frame with wood adhesive and a staple gun. This type of work, although more stressful then painting or shopping, was much more rewarding in terms of developing my skills. Having worked with wood alot before I was much more confident in working quickly without being concerned that my accuracy was slipping. I also enjoyed it far more and was satisfied at the end of the day as I felt I had made a more important contribution to the show as a whole.

For my next job I spent a morning cutting out the middle of pages from books. As the book would open during the show and reveal silhouettes of unborn babies lit by small lights hidden inside the books. As can be seen below.
The pages removed from the book leaving just their outer border.
The book neatened up.
The baby sculpture added inside with the light concealed within.
 As well as constructing these books I also made a number of 'mock' books that would simply fill up the shelves to make the room look more full and like a collection that has been added to over the years.

I was given a number of empty book shelves or covers that I first padded out with polystrene to hold the shape of the book as can be seen here.

Having constructed the frame of the book I used masking tape torn into strips to give the impression of pages from the books. As they were quite far away from the audience the detail wasn't crucial.


Once completed and stacked together I was happy with the overall look of the books that would be fine from the audience's view point and fit in well with the rest of the set. As some of them were placed on the top platform of the set this also made them alot safer, say should one of them fall off the book case and hit someone, as unlikely as that was.


This completed my time working on the show. Looking back on it now I feel extremely fortunate to have been involved. I learnt a great deal about the process of bringing a professional show to the stage, dealing with unexpected problems and resolving them quickly and efficiently as well as gaining a better idea of what sort of areas I am interested in exploring in the future. I am extremely thankful to Turtle Key Arts, who threw me in at the deep end and trusted me to contribute on their show to a level where I felt I made a real difference and wasn't just given the dull jobs to keep me busy. My time spent at the warehouse in Lewes was extremely important in my development as a theatre technician and although daunting at first, I feel as though I gained a huge amount in a short space of time by working long days and never letting the standard of work slip during my time there. The whole process of seeing a set being assembled from scratch to transporting it to the theatre venue and completing the dressing of the stage was fantastic and I hope I will be able to develop this knowledge and practice on the future shows I work on. Be them inside or outside of uni.

Sweeney Todd: The Barber's Pole.

For the past two weeks I have been working on three separate shows, the production week in Newbury for the set I helped construct in Lewes, Scenic painting in Cambridge on the set for Ghosts, that begins its run at the Theatre Royal Winchester from next week, and Sweeney Todd, which is rapidly approaching its production week. For Todd I have been working on several aspects of the set at once, but will talk about them separately and focus on them one at a time.

The barber's pole I decided to include is one of the smallest sections of the set, it also proved to be the hardest, most complex and overall most fun part to make.

Initially I had only included it as a refernece point for the steampunk style of the production, but I ended up becoming quite intersted in actually having one in the set. At first it seemed like one of those aspects of a set which isn't crucial, but would be nice to have on stage if there was time and budget for (being a drama society show). Lookig at it now I'm glad I made the choice to build it, not only is it instantly recogniseable to the audience but it sets the scene and plays the role of quite an iconic symbol of the story, I know Tim Burton used alot of promotional posters for his film version which were simply the title and a barber's pole below it.

The firt thing I did then was try and find something practical that could form the main tube section of the piece. Like the oven I avoided spending any money at all and instead searched and scavenged for an appropriate object. I eventually stumbled across the perfect shape when I was walking home from uni. Round the back of the theatre there is alot of building walk going on and as a result the area is a huge construction site. Here I managed to find a bit of discarded drainage piping that had been left by the road, as you can see below.


 As you can see from the picture the tube had a massive gash in the side of
 it where it had partially shattered and left a unusually shape in the side. My original idea was simply to cut the unspoilt sections from the top and bottom, stick those together and throw away the part which had been badly damaged. However, I eventually decided to make the most out of this opportunity and include the broken part into the actually structure. It would have been incredibly difficult for me to have created the same effect with a normal piece of tubing, so I instead decided to remove the top and bottom as planned (a it would be too long) and keep the broken middle section. By pure coincidence the gash only effected half of the circumference of the tube. This meant that if I left the tube free in its frame I could have the broken side on show for the first act of the play, when the shop has been abandoned for years, and turn it around to only show the clean, smooth side for the second act. This would represent how the shop is becoming more successful and he is able to afford to fix and replace parts as more money comes into the business.

My next step was to construct the end pieces that would cap the top and bottom of the structure and form the link to the frame, whilst keeping the tube its self free.

Here you can see what I used to construct the end pieces of the pole. I wanted them to have quite an unusual and radical design. As the setting is steampunk, victorian era I thought they would have quite an ornate but elaborate shape/design to them that explained to the audience this is not a standard, period set production (as will be reflected in the costumes). Once again I have used plant pots, coffe cups, and whatever else I could find budget free to work with. You'll notice also that in the second picture the tube has been sprayed white in advance of being painted.

For the next stage of development I was back in the uni workshop, here I used a jigsaw to carve the ornate frame work for the piece which would bridge the caps of the pole with the back board of the structure. My time in Lewes working with a jigsaw (as well as many other tools) gave me alot of confidence in carving quite a complex structure and as much as I had improved with using tools I still struggled to achieve the desired shapes I was after. However, I was happy with what I achieved, which you can see below.

The assembled frame work.
Having finished cutting out the wooden section of the structure and sanding it down my next move was to make sure the bonds between the wood were completely solid as they would be taking the weight of the pole. Below you can see how I both glued and screwed the pieces together before assembling all of the pieces I add so far constructed.

The Barber's pole was really starting to take shape by this point and, as complex as it had been to make, I was really surprised by how quickly I knocked the whole thing together. Originally I had thought the barber's pole would be too complex and too much work but as it turned out I had managed to build it in a very short space of time. I suppose this was due to the fact I had a pretty good idea of what I wanted to do before hand and how to go about it.

I realised that once the frame work was attached to the caps of the pole it would be difficult to remove the main pole section again, my next move therefore was to paint the pole and get it out of the way so I could focus on securing the whole structure together and cladding it.


Using a strip of paper I had cut out I began to draw out the stripped lines that flow all the way down the pole, moving the piece of paper down the tube as I drew it out. Once I had finished this it wa time to paint the red stripe down the tube.


Here you can see the pole section completed. With this part of the structure now finished I could place it within the caps and begin attaching the structure together properly so it would hold its shape well when placed upright. I was really surprised by how bright and striking the colours of the pole where, making it really stand out. Although at the time I considered this section of the piece completed I may go back if there is time and dull down the colours on the broken side, so the transition betwen acts is more apparent and in keeping with the style of it being old and delapidated on one side, and new and clean on the other. Which I think will be a nice touch to the show. Below You can all the pieces I had constructed so far finall coming together. Now the pole was sitting within the caps t either end my next thought was how i would go about securing them to the wodeen frame work...

One of the first ideas I tried out was to first secure the pieces in place with masking and LX tape, and them papier mache over the top. The problem with this was as the wood had not been cut at an angle on the ends, the slopes of the caps wouldn't sit happily in them.

My next idea was to clad the caps in card as I had planned and secure that to the structure instead, this proved betteer but still not satisfactory. As I had not settled on a design for the caps I began to cut strips of card into random shapes to give the idea it had been clad in sheets of metal, giving an industrail, obscure look.
Here you can see how I started to build the surface detail for the caps of the pole. Although I wasn't particularly happy with it I left it for the mean time. As you can see in the photo only one side has been clad in card. For the other end, the top, I wanted something that was more of a decorative finish, I had imagined that the tube was spiralling up to something special, some sort of design. But for the time this concluded my work on the barber's pole as I had other commitements to be getting on with.

Sunday, 27 February 2011

From Newbury with Love: Part Two.

Last week I returned to Lewes to help work on the set for From Newbury with Love. As the get in for the show is next week the pace of the work has picked up dramatically. When I arrived I spent the first few hours wiping down the metal frames that had been welded together with white spirit. Although an increaibly, mind numbingly boring job it was still an important aspect of preparation for the set as the cast will be moving amoung thee structure and obviously can't get covered in grease, especially on their costumes.

Although I didn't at all enjoy the task I felt it was still an important process to go through as it gave me an understanding of a wider varitey of the the construction process as a whole.


After I had spent the morning rubbing down the metal I began work sanding down the shelves that had been coated partially in poly filler to give a seamless finish. I then began painting the shelves once it was completely smooth and the saw dust had been wiped off, starting from the top and working my way down.


I found the work I did in the afternoon much more rewarding than what I had experienced that morning, mainly because I much prefer working with wood than metal . As my time in Lewes has progressed I have began to gain a very good idea of what I enjoy doing and what kind of work I prefer to be involved in. In terms of the construction element of set work I much prefer working from designs and cutting and building structures to a specification, as opposed to monotaniously repeating tasks such as cutting metal bars for someone else to assemble. However, it is all part of the process.

This week I will be travelling down to Newbury where the set is being delivered to and be involved in the assembly in the theatre prior to the productin week.

Sweeney Todd: Part Three.

During the last week I continued working back into the steampunk oven for sweeney todd, touching up the surface detail and improving the overall look of the set piece. I also continued organising the other aspects of the set in preparation for the production week. In terms of the oven I attacher the feet, gluing the backs of them and securing them in place with masking tape whilst they dried.


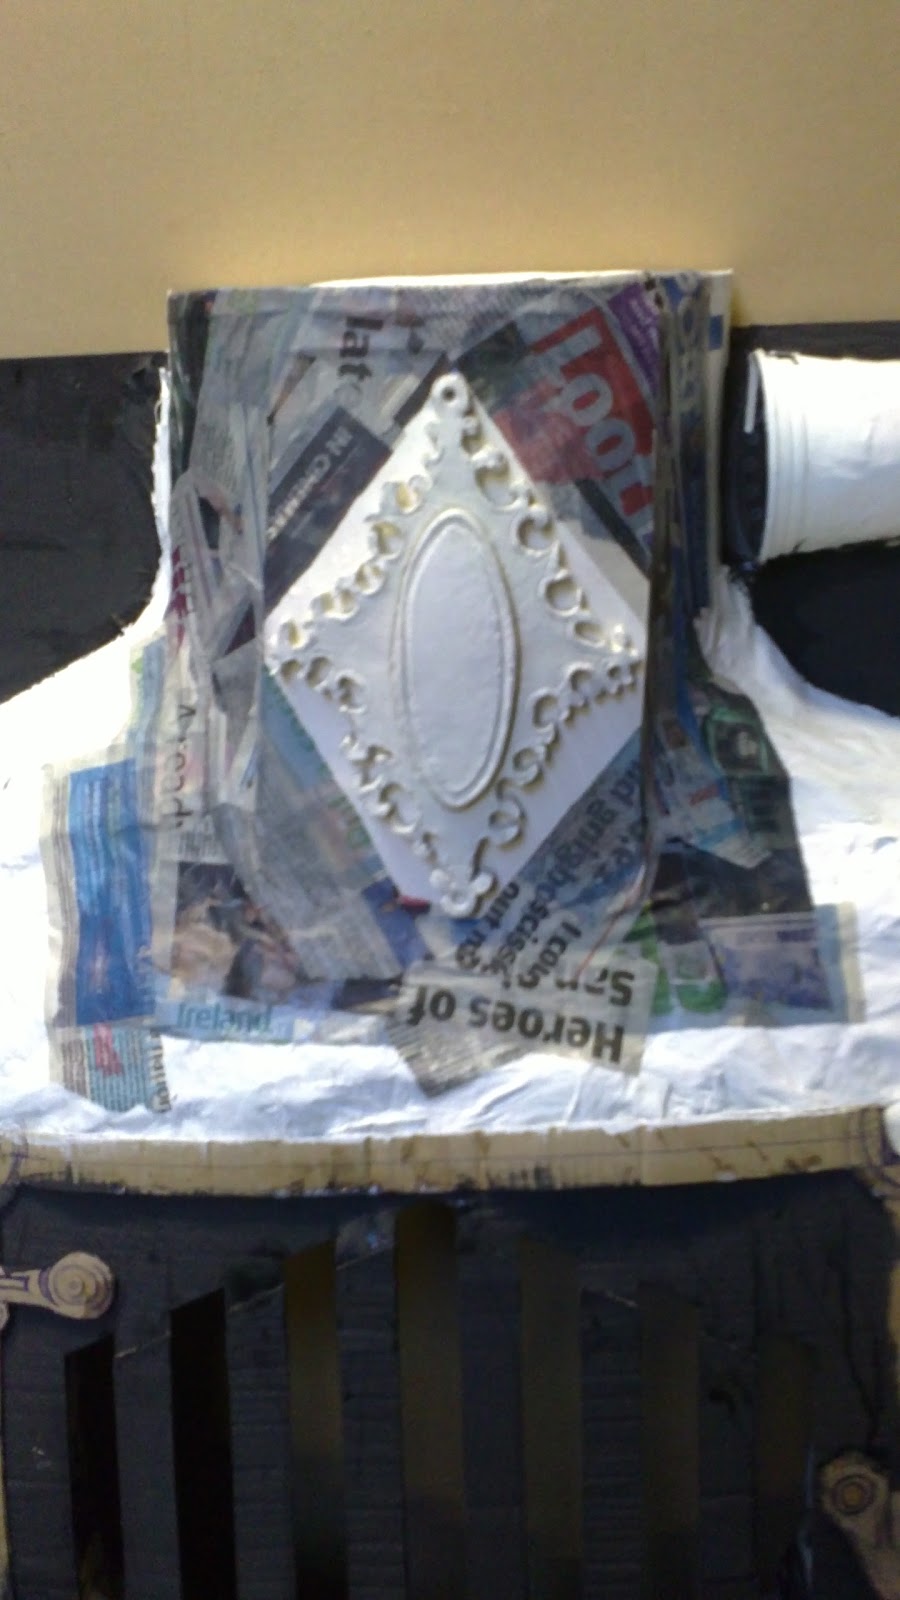
With the feet in place I then secured more smoothly the Victorian motif, as it had only been attached with LX tape at this point I used papier mache to smooth the surfaces and attach it to the main oven better. Although I would eventually be cladding the sides in card to make them more rounded and fit the shape of the oven, I did this for the time being incase the tape came lose whilst it was left in the workshop.


At this stage I started working on the rest of the oven whilst the feet and newspaper dried. I began smoothing down the sides of the corrugated cardboard with builder's cork to give a more realistic look to the oven.


Once I had worked on the frame of the grill I concentrated on the general surface of the oven, creating a smoother, more realistic surface detail. As I had attached the feet earlier I made them more secure with the poly filler and also worked into their surfaces. Having done that I painted the rest of the structure with white emulision.


After this I worked on the top chimney section, as the victorian motif had altered the shape of the top of the oven I used card to reshape the chimney. Giving it a more circular look again.


As I had secured the card with masking tape I instantly painted over it with emulsion as the tape would have only stayed stuck down for so long. As can be seen below.


Although not perfectly smooth and with still a little work to do the oven is close to finishing. All that remains is to finish working on the surface detail, paint, and reinforce the interior to prevent from burning by lights.

The oven so far.


The Visit: Sign painting and Construction.

For the last two weeks I have been focusing primarily on the signs for The Visit. Having already cut out the sizes roughly from hard board I began work on drawing them out and painting them up in advance for the show this coming week. My first task was to accurately draw out each of the signs. As they will be quite close to the audience it was important they were perfectly drawn out.
As I had a short time in which to complete the signs I often worked on several at once. As I had to wait for one coloured section to dry before I continue painting it I would work on another while waiting, speeding up the whole process.


I worked on the signs at home as the light in the workshop was not suitable for gauging what colours worked well together and create the right style. As the play is set in post second world war europe the look of the signs was crucial in setting the time frame. Furthermore, the choice of colours I used, as well as the fact I didn't undercoat the signs in white first, meant they had an aged look to them; approptriate for the delapidated setting of Guellen town.

 
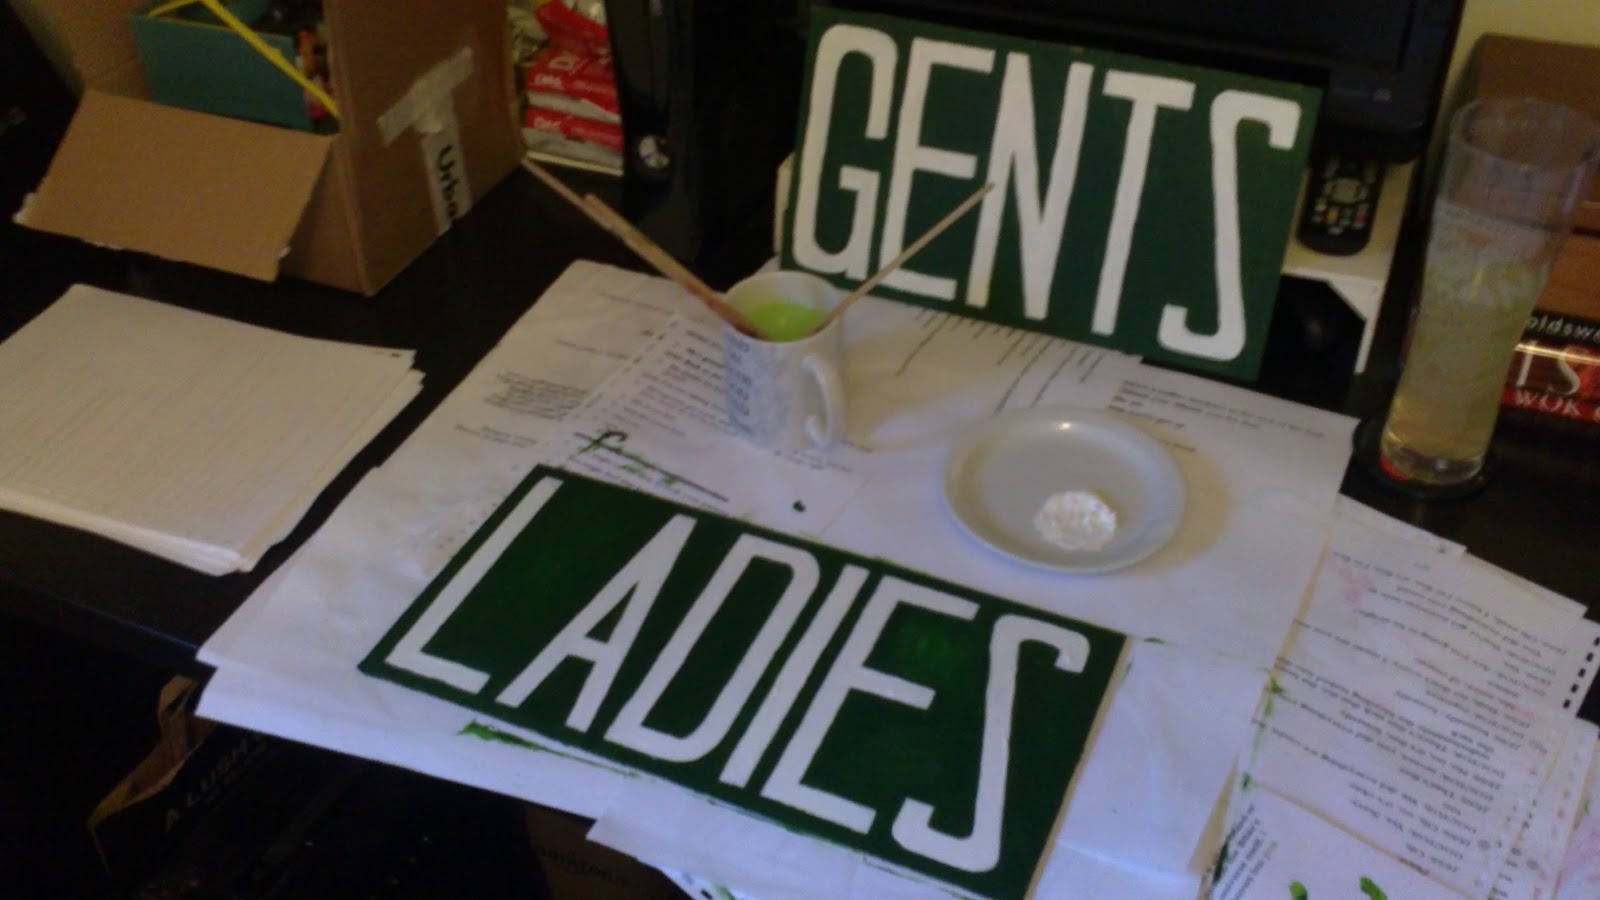
 The Golden Apostle Hotel is the most prestigious place in what is essentially a run-down, boarded up town. For the sign I wanted to create an impression of ornate splendour but still give it a worn down look. The picture here shows the colours before I gave them a second coat, as they are far too bright here. I think in the end it achieved a mood of faded grandeur, that hopefully will be communicated to the audience. The other sign here is for Ill's shop, I imagine he had painted the sign himself and, as a popular figure in the town, takes alot of pride in it. The look I wanted to achieve is one of simplicity, but proudness. These back stories I imagined, having read the script, helped me massively in me designing of the signs.

Finishing off the signs.

The signs completed.
Having finished work on the signs the only thing I had left to construct was the railroad signal. This was easily built out if three pieces of wood and required little work other than sawing the ends into arrows and painting white with black stripes, as can be seen below.

Once the signal was painted white with emulsion I decided to use black spray paint to finish the sign as this was quicker than using paint to complete it. Using masking tape I was able to get a quic an accurrate line across the tips of the arrows.

 This completed my work on The Visit. Overall, I found it a good opportunity to hone my painting skills and improve on working to a deadline.

Sunday, 13 February 2011

From Newbury with Love

I spent the best part of last week travelling down to Lewes daily to help build the set for a show in Newbury, just outside of Reading. Despite the show being in Newbury the production company had rented out a warehouse in Lewes as it was more affordable for a show on a strict budget. My main job was cutting all the plywood sheets and metal tresses down to size so the set could be constructed.


The metal was alot more of a task than the wood. Where wood is a nicer material to work with, as it can be shaved and sanded, metal is alot more of a struggle. We therefore had to be dead on with our accuracy so that we did'nt waste the supply of resources the company had bought.


As the metal was being welded together, and the plywood fixed on top, the accuracy of our measurements was crucial. We would measure a length, move it into position over the saw, re-check the measurement, bring the saw down to the mark, check it again, tighten the metal tress into place and check the measurement again. We were advised to not mark a line on the metal/ wood as this gave a small chance of inaccuracy. Therefore we laid a tape measure over it and brought the blade of the saw down to the mark to be certain.

Once we had cut the metal we would check
the measurement again and, if necessary, shave off any unwanted millimeters. This was particularly difficult for metal that had to be cut at an angle. This was an incredably tiring and time consuming task but completely vital.

After a while we began to get into the rhythm of the routine and picked up speed, but the first hour or so was pretty gruelling! We spent the majority of the first day just cutting the metal and getting used to the chop saw. All though the tasks we were set were very repetitive, I really gained alot from simply using a tool over and over again. As well as the chop saw and circular saw I also got very comfortable with using a jigsaw and angle grinder. Tools that I had some experience with in the past but not to the degree I had during last week. It was a brilliant opportunity to not only become skilled with a number of different tools but also to become more experienced at dealing with the stress of having to get measurements spot on every time.

Here you can see the plans for the flooring of the stage. Each sheet of wood had to be scaled up from the drawing on the plans and marked out before being cut with the jigsaw. Again this helped me massively improve my skill with power tools as well as drawing things to scale and working from a design plan. By the end of the week I was exhausted but satisfied with what I had achieved and learnt during my time in Lewes. The next production week isn't until the 21st of february so hopefully I will be free and able to travel down to help out again.